I like the look of Java and J2EE for Web Development, but there are so many frameworks, standards and other clutter getting in the way of getting to grips with it. Coming from a Delphi background where everything has a lovely graphical interface and all the messy details are nicely hidden, trying to get to grips with Java is hard.
To make life even harder for myself, I have rejected Eclipse in favour of NetBeans because I find it more intuitive and responsive to use. However, most Java examples and tutorials assume you are using Eclipse.
Anyway, I am plowing on regardless and want to try out ClickClick on Google AppEngine. The first step is to compile Apache Click from source. Here is how I did it:
I am using NetBeans 6.9 with the NBAppEngine plugin
1. Use the subversion support in NetBeans to get the source code. If you do not have the subversion plugin installed, NetBeans will prompt you to install it and re-start the IDE.
2. Enter the URL of the Click subversion repository: http://svn.apache.org/repos/asf/click/trunk/click and click the Next button
3. Select the Local Folder where you want to save the files, I have chosen a folder called "3rdParty". Working Copy shows where the files will be saved. Now click Finish.
4. NetBeans will download the source and when it is finished will ask you if you want to create a project for it. Say yes, click "Create Project".
5. For the project type, select Java Free-Form Project
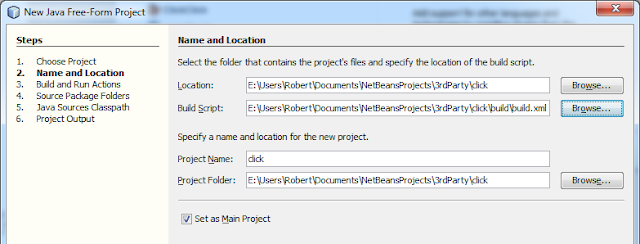
6. Select the location of the files you downloaded in step 3. The build file is ...click\build\build.xml. The project name and location are filled in by NetBeans.
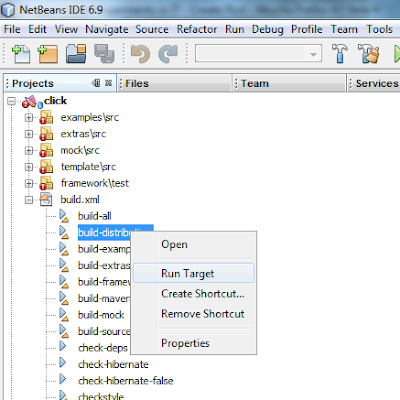
7. You should now have a project called "click" and if you expand the build file, you can see the various tasks included in it. I right-clicked on "build-distribution" and selected Run Target. To my amazement it worked!
8. My 3rdParty\click\dist folder now contains the four files I need to build clickclick: click-2.3.0-M1.jar, click-extras-2.3.0-M1.jar, click-mock-2.3.0-M1.jar and click-nodeps-2.3.0-M1.jar.


No comments:
Post a Comment